- What Taping Is Actually For
- The Standard Eye Pad Placement
- Two Checks Before You Start Lashing
- The Closed Eye Method for Twitchy Eyes
- Add Tape Over the Bottom Lashes
- The Two Tape Method, No Pad
- Lift the Lashes Off the Pad
- Tape for the Inner Corners
- If the Eye Is Red Afterwards
- Which Technique to Reach For
- Frequently Asked Questions
Taping is the part of a lash set nobody sees. It is also the part that decides how fast the rest of the appointment goes. Good placement gives you a clean view of the lash line and keeps the bottom lashes out of the way. Bad placement traps lashes, irritates the eye, and hides the inner corner right where you need to see it most.
Here are the taping techniques I use every day, including the ones I fall back on when a client’s eyes will not stay still.
What Taping Is Actually For
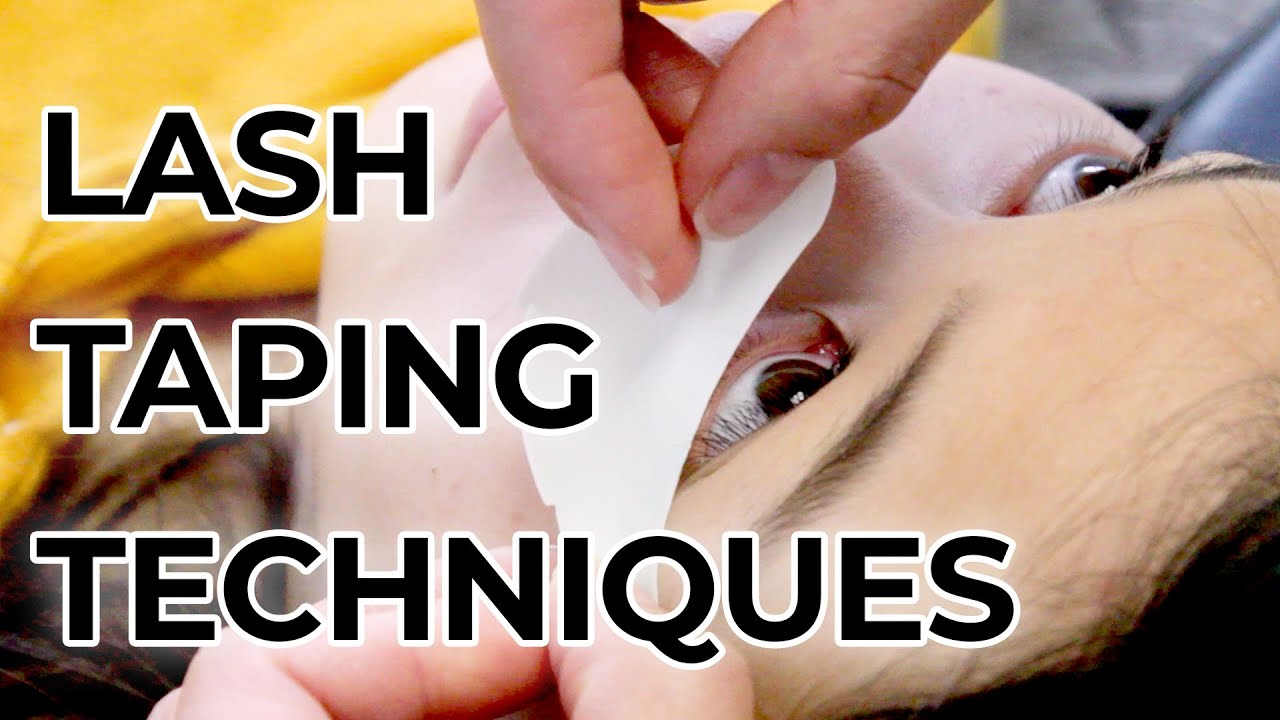
Taping does three jobs at once. It holds the bottom lashes down so they cannot stick to the adhesive. It gives you a pale background so you can see each natural lash. It also protects the lower lid through a two hour appointment.
You have two tools to work with. Under eye gel pads cover a lot of ground and feel cool and comfortable. Tape is thinner and more precise, so it gets into places a pad cannot. Most of your lashing sets will use both.
The Standard Eye Pad Placement
Start here. This is the placement that works for most clients.
Ask your client to look up. That pulls the lower lid down and opens up the space you are working with. Place one corner of the eye pad ↗ down first. Then walk it across to the other corner, pressing gently as you go.
Leave a small gap at the waterline. Around half a millimetre to a millimetre is the standard, and it matters a lot. Any closer and the pad can sit against the eye or press on the oil glands along the lid margin. Any further out and you start leaving lower lashes uncovered.
Every lower lash needs to be under the pad. A single one left loose will find your adhesive during the set, and you will not notice until the client opens their eyes and the lid will not separate.
Do not try to lay the whole pad down in one motion. It will shift. It will land crooked. You will be peeling it back off. Start with one corner, then work it across.
Two Checks Before You Start Lashing
Once the pad is on, stop and check two things. Both take only a few seconds and both save you a lot of trouble later.
Check for trapped lashes. Natural upper lashes get caught underneath the pad all the time. Lift the edge of the pad and look. If a lash is stuck under there, use your tweezers ↗ to bring it out before you go any further. A lash you miss now is a lash you skip in the set.
Ask if the pad feels okay. This one matters more than lash artists think. A pad can sit perfectly while the eye is open, then shift the moment your client closes it. If it moves up onto the eye, it will irritate your client for the whole appointment.
If they say it is touching, have them keep their eyes closed and adjust it from there. Do not make them open up again. You want to fix it in the position they will actually be lying in.
The Closed Eye Method for Twitchy Eyes
Some clients cannot hold their eyes open without fluttering. Asking them to look up just makes it worse. For those clients, skip the open eye step completely.
Have them close their eyes and keep them closed the whole time. Gently lift the upper eyelid. Place one corner of the pad or tape down, then work across to the other corner the same way you would normally.
You get the same placement without asking anything of the client. This is the technique I use with nervous first timers.
Add Tape Over the Bottom Lashes
Sometimes the pad alone is not enough. Bottom lashes that are long or curl upward will still reach past the edge of the pad and find your adhesive.
Have the client look up. Slide the pad in just underneath the bottom lashes. Then lay a strip of tape over the top of the lower lashes to pin them down flat.
Tape choice matters here. Use a sensitive tape that is latex free, breathable, and made for skin. The adhesive strength is what causes most tape reactions, not the tape itself, so a gentler tape removes a problem before it starts.
One tip before the tape goes near a face. If your tape is very sticky, press it onto the back of your hand once first. That lifts some of the adhesive off and makes removal far gentler at the end of the appointment. Your client will notice the difference.
The Two Tape Method, No Pad
Not everyone likes working with pads. If you prefer tape, you can do the whole thing with two strips.
Have your client look up. Take the first strip and lay it down starting at one corner. Take the second strip and do the other corner. Between them they cover the lower lash line.
There is a variation worth knowing. Instead of two strips meeting in the middle, cross them. One strip runs from the inner corner outward, the other from the outer corner inward, and they overlap in an X. The cross holds the pad and the bottom lashes together in one move, which is useful on clients whose pads keep drifting.
There is one catch. Some tape is too clear. You end up with almost no contrast between the tape and the natural lashes, and isolating gets harder than it needs to be.
The fix is simple. Lay an eye pad on top of the tape. The pad gives you a solid pale background to work against, and the tape underneath is still doing the holding.
Lift the Lashes Off the Pad
Here is a problem that shows up on fills. The bottom lashes are already taped down, and the natural lashes are sitting too close to the tape or the pad. Every time you go in with tweezers you are fighting the edge.
Take a strip of tape and place it at the base of the lashes. Then lift it slightly and anchor it at both corners. That small lift pulls the lash line up and away so nothing is resting on the pad.
You are not trying to stretch the eye open. A little lift is enough.
Tape for the Inner Corners
Inner corners are the hardest part of any set. The lashes are shorter, finer, and they sit at an angle that is awkward to reach.
Place a small piece of tape right in the inner corner. Then lift it diagonally, up and outward. That angle brings the inner corner lashes out where you can actually isolate them.
Once you get used to this one you will use it on almost every client. Inner corners are usually where retention quietly fails, because they are the lashes people rush.
If the Eye Is Red Afterwards
Redness after a set gets blamed on the adhesive almost every time. Taping causes a fair share of it, and the two look different once you know what to check.
A sharp, straight line of redness points at the pad or the tape. That line is the edge of something that moved and rubbed during the appointment. It usually sits low on the eye, right where the pad was.
Adhesive irritation looks different. The white of the eye goes red rather than marked with a line, and the client can describe stinging rather than soreness. A true allergy shows up on the outside instead, with swollen lids, itching, and skin that stays irritated after the appointment ends.
This is worth getting right. A client who thinks they are allergic to lash adhesive will stop getting lashes done. If the cause was a pad that slipped, the fix is placement, not giving up extensions.
Which Technique to Reach For
You do not need all of these on every client. Start with the standard pad placement and add a technique when something is not working.
- Standard pad placement — your default for most clients
- Closed eye method — twitchy eyes, nervous clients, first timers
- Tape over the bottom lashes — long or upward curling lower lashes
- Two tape method — when you prefer tape, add a pad on top for contrast
- Criss-cross — pads that keep drifting mid-set
- Base tape lift — fills, or when lashes rest on the pad
- Inner corner tape — any time the inner corners are hard to reach
Taping is worth practicing on its own. Spend a few sets getting it right and everything after it gets faster.